Blender IKKINOMI は以下に移動しました。
ドメイン廃止予定日:2026年01月06日
3秒後に新しいページへ移動します。
自動的に移動しない場合は、お手数ですが以下をクリックしてください。
Blender IKKINOMI pages have moved to a new location.
The page will redirect in 3 seconds.
If it doesn't, please click the link below.
2023-12-13
11
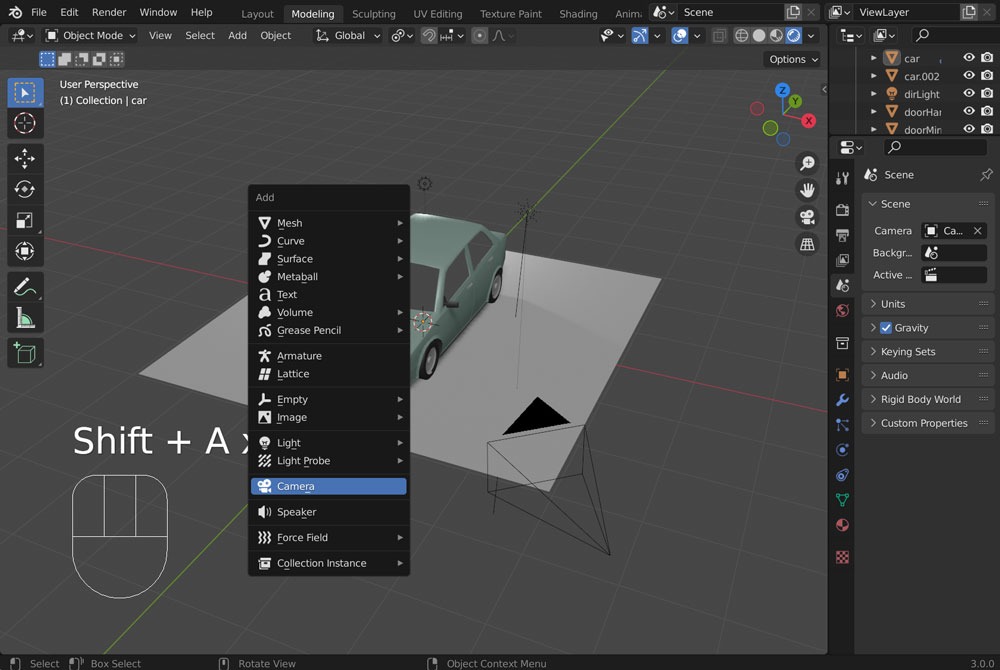
Add a rendering camera
Add a camera and move/rotate it.
Select camera by
There won’t be any changes on the screen.
Please try navigating the working camera using the

A new camera has been added at the current 3D cursor position, right? In fact, the 3D cursor serves as the reference point when adding objects. This applies not only to cameras but also to any objects or scenes.
Now, using the movement and rotation techniques you’ve learned, let’s position the camera to capture the right side of the car.
Navigate with the working camera,
The adjustments are made in the sequence described above.
However, even if you switch to the new camera with
To view from the new camera, select it from the Scene tab (fifth tab from the top in the vertically elongated area on the right) under the Camera dropdown in the Properties panel.
Now, you can switch to the new camera (Camera.001) with
However, it’s inconvenient not being able to move while viewing from the new camera.
Just like manipulating the working camera with a